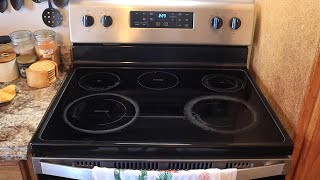
Media Summary: This video provides step-by-step repair instructions for 0:00 Introduction and Safety 0:45 Tools and Parts Overview 1:30 Remove Cooktop Screws 2:15 Disconnect Old Element 3:00 ... 0:00 Introduction and Safety 0:57 Remove Cooktop Access 1:20 Disconnect Old Element 2:28

Whirlpool Range Replace Dual Surface - Detailed Analysis & Overview

This video provides step-by-step repair instructions for 0:00 Introduction and Safety 0:45 Tools and Parts Overview 1:30 Remove Cooktop Screws 2:15 Disconnect Old Element 3:00 ... 0:00 Introduction and Safety 0:57 Remove Cooktop Access 1:20 Disconnect Old Element 2:28 0:00 Introduction and Safety 0:30 Tools and Part Overview 1:00 Remove Old Cooktop 1:45 Transfer Hinges 2:30

Photo Gallery

Whirlpool Range/Cook Top Repair - How to Replace the Dual Surface Element (Whirlpool # W10823692)
Whirlpool Range Replace Dual Surface Element Switch #W10434452
Whirlpool Range 12" Surface Element Replacement #W10189281
How To: Whirlpool/KitchenAid/Maytag Large Surface Element W10823692
Whirlpool Range/Cook Top Repair - How to Replace the Element with Limiter (Whirlpool # W10823711)
How To: Whirlpool/KitchenAid/Maytag Medium Surface Element W10823698
Whirlpool Electric Range FIXED! Dual Cooktop Element Not Heating
How To: Whirlpool/KitchenAid/Maytag Surface Element WP8273992
Whirlpool Range 6" Surface Element Replacement #8273994
How To: Whirlpool/KitchenAid/Maytag Cooktop Assembly W10245805
How To: Whirlpool/KitchenAid/Maytag Small Surface Element WPW10259868
How to repair a Whirlpool flat top stove burner that stays on high
View Detailed Profile
Whirlpool Range/Cook Top Repair - How to Replace the Dual Surface Element (Whirlpool # W10823692)

Whirlpool Range/Cook Top Repair - How to Replace the Dual Surface Element (Whirlpool # W10823692)

Do you need help

Whirlpool Range Replace Dual Surface Element Switch #W10434452

Whirlpool Range Replace Dual Surface Element Switch #W10434452

This video provides step-by-step repair instructions for

Whirlpool Range 12" Surface Element Replacement #W10189281

Whirlpool Range 12" Surface Element Replacement #W10189281

This video provides step-by-step repair instructions for

How To: Whirlpool/KitchenAid/Maytag Large Surface Element W10823692

How To: Whirlpool/KitchenAid/Maytag Large Surface Element W10823692

0:00 Introduction and Safety 0:45 Tools and Parts Overview 1:30 Remove Cooktop Screws 2:15 Disconnect Old Element 3:00 ...

Whirlpool Range/Cook Top Repair - How to Replace the Element with Limiter (Whirlpool # W10823711)

Whirlpool Range/Cook Top Repair - How to Replace the Element with Limiter (Whirlpool # W10823711)

Do you need help

How To: Whirlpool/KitchenAid/Maytag Medium Surface Element W10823698

How To: Whirlpool/KitchenAid/Maytag Medium Surface Element W10823698

How To

Whirlpool Electric Range FIXED! Dual Cooktop Element Not Heating

Whirlpool Electric Range FIXED! Dual Cooktop Element Not Heating

Is your Maytag electric

How To: Whirlpool/KitchenAid/Maytag Surface Element WP8273992

How To: Whirlpool/KitchenAid/Maytag Surface Element WP8273992

0:00 Introduction and Safety 0:57 Remove Cooktop Access 1:20 Disconnect Old Element 2:28

Whirlpool Range 6" Surface Element Replacement #8273994

Whirlpool Range 6" Surface Element Replacement #8273994

This video provides step-by-step repair instructions for

How To: Whirlpool/KitchenAid/Maytag Cooktop Assembly W10245805

How To: Whirlpool/KitchenAid/Maytag Cooktop Assembly W10245805

0:00 Introduction and Safety 0:30 Tools and Part Overview 1:00 Remove Old Cooktop 1:45 Transfer Hinges 2:30

How To: Whirlpool/KitchenAid/Maytag Small Surface Element WPW10259868

How To: Whirlpool/KitchenAid/Maytag Small Surface Element WPW10259868

How To

How to repair a Whirlpool flat top stove burner that stays on high

How to repair a Whirlpool flat top stove burner that stays on high

... Impact Driver https://amzn.to/358abhL W10434452 for

Whirlpool Range 8" Surface Element Replacement #W10169799

Whirlpool Range 8" Surface Element Replacement #W10169799

This video provides step-by-step repair instructions for