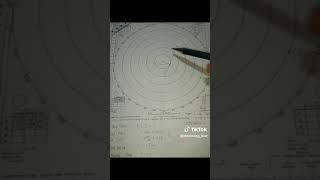
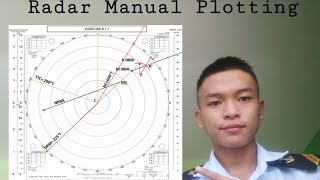
Media Summary: Radar Plotting, Part 3—Finding the New Course to Steer and Put the CPA to a Required Side and Range. Refresh Maritime specialises in making complex maritime concepts clearly understood. This video forms This video is intended for maritime students and those taking a

Radar Plotting Part 3 Finding - Detailed Analysis & Overview

Radar Plotting, Part 3—Finding the New Course to Steer and Put the CPA to a Required Side and Range. Refresh Maritime specialises in making complex maritime concepts clearly understood. This video forms This video is intended for maritime students and those taking a San Jacinto Maritime - Video Objectives: 1. Illustrate and explain collapsed In this video Capt. Bob lays down the foundation for determining the postion, course, and closest point of approach of a target. A video clip describing the procedures in

This video is designed for maritime students and those taking a COLLISION AVOIDANCE RADAR PLOTTING PART 3

Photo Gallery

Radar Plotting, Part 3—Finding the New Course to Steer and Put the CPA to a Required Side and Range.
Collision Avoidance Radar Plotting 3
RADAR Plotting Part 3  Finding the True Course and True Speed of the Target
Radar Plotting: Complete The Plot
Radar Plotting Part-3 | Chief Mate MMD Phase-II | Action by Own Ship, A/Co, P-D, T-T, HR, nav aids🚢💥
Basic Radar Plot - Radar Plotting
Radar Plotting (Part 1 of 2):  Determine CPA, TCPA, BCPA, BCR, BCT, DRM & RS | with a 6-Minute  Rule
Radar Plotting - Part Three
Collision Avoidance Radar Plotting 1
How to plot target true course and speed | Manual Radar Plotting | Part 3
Radar Manual Plotting: Avoidance Course and Avoidance Speed
Radar Plotting (Part 2 of 2): Collision Avoidance | Determine New Course & Speed | Mx, NRML, ADRML
View Detailed Profile
Radar Plotting, Part 3—Finding the New Course to Steer and Put the CPA to a Required Side and Range.

Radar Plotting, Part 3—Finding the New Course to Steer and Put the CPA to a Required Side and Range.

Radar Plotting, Part 3—Finding the New Course to Steer and Put the CPA to a Required Side and Range.

Collision Avoidance Radar Plotting 3

Collision Avoidance Radar Plotting 3

In

RADAR Plotting Part 3  Finding the True Course and True Speed of the Target

RADAR Plotting Part 3 Finding the True Course and True Speed of the Target

Follow for more maritime tips! #marinetransportation #radarplotting #maritime #marino #

Radar Plotting: Complete The Plot

Radar Plotting: Complete The Plot

Refresh Maritime specialises in making complex maritime concepts clearly understood. This video forms

Radar Plotting Part-3 | Chief Mate MMD Phase-II | Action by Own Ship, A/Co, P-D, T-T, HR, nav aids🚢💥

Radar Plotting Part-3 | Chief Mate MMD Phase-II | Action by Own Ship, A/Co, P-D, T-T, HR, nav aids🚢💥

Welcome to

Basic Radar Plot - Radar Plotting

Basic Radar Plot - Radar Plotting

Basic Radar Plot -

Radar Plotting (Part 1 of 2):  Determine CPA, TCPA, BCPA, BCR, BCT, DRM & RS | with a 6-Minute  Rule

Radar Plotting (Part 1 of 2): Determine CPA, TCPA, BCPA, BCR, BCT, DRM & RS | with a 6-Minute Rule

This video is intended for maritime students and those taking a

Radar Plotting - Part Three

Radar Plotting - Part Three

San Jacinto Maritime - Video Objectives: 1. Illustrate and explain collapsed

Collision Avoidance Radar Plotting 1

Collision Avoidance Radar Plotting 1

In this video Capt. Bob lays down the foundation for determining the postion, course, and closest point of approach of a target.

How to plot target true course and speed | Manual Radar Plotting | Part 3

How to plot target true course and speed | Manual Radar Plotting | Part 3

Understanding manual

Radar Manual Plotting: Avoidance Course and Avoidance Speed

Radar Manual Plotting: Avoidance Course and Avoidance Speed

A video clip describing the procedures in

Radar Plotting (Part 2 of 2): Collision Avoidance | Determine New Course & Speed | Mx, NRML, ADRML

Radar Plotting (Part 2 of 2): Collision Avoidance | Determine New Course & Speed | Mx, NRML, ADRML

This video is designed for maritime students and those taking a

COLLISION AVOIDANCE RADAR PLOTTING PART 3

COLLISION AVOIDANCE RADAR PLOTTING PART 3

COLLISION AVOIDANCE RADAR PLOTTING PART 3