Media Summary: Step 1: Colouring the Pencil Sketch The original pencil sketch is scanned in to Photoshop and then I start to build the colour. Step 4: Aging and Resolution I recommend increasing the resolution of the face, to make sure you get the most detail from it as ... Step 9: Akvis Sketch There is one final step I like to apply to most of my artworks, which gives the finished artwork a hand drawn ...
Intro Garry Pye Tutorial Article - Detailed Analysis & Overview
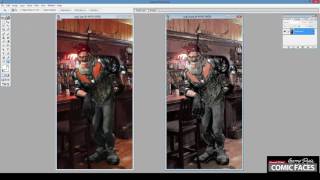
Step 1: Colouring the Pencil Sketch The original pencil sketch is scanned in to Photoshop and then I start to build the colour. Step 4: Aging and Resolution I recommend increasing the resolution of the face, to make sure you get the most detail from it as ... Step 9: Akvis Sketch There is one final step I like to apply to most of my artworks, which gives the finished artwork a hand drawn ... Date: Apr 25, 2023 (Check your local time: ... Taking that first step can feel a little intimidating, but it's also the most exciting part. Give Cartoon Animator a try and start creating ... Come and learn all the tips and tricks you need when working with the CTA5 version of Shirley Stickman G3 for Cartoon Animator ...
Discover how Cartoon Animator's AI Smart Search simplifies the workflow of finding precisely what you need for your animation ... Download CTA: Learning an animation software can be intimidating. Step 6: Clothing and Accessories Now that your new characters face and body are morphed, it's time to dress them for the scene. Step 8: Finishing in Photoshop With your background image loaded in Photoshop, open all your rendered .PNG character files ... Step 3: Morphing the face in Character Creator Now that you have your face rigged as a 3D head model, you can drag and drop ...


![[FREE Webinar with Garry Pye] How to Easily Start Your Animation Journey with Cartoon Animator](https://i.ytimg.com/vi/3iKuMMy0MEQ/mqdefault.jpg)